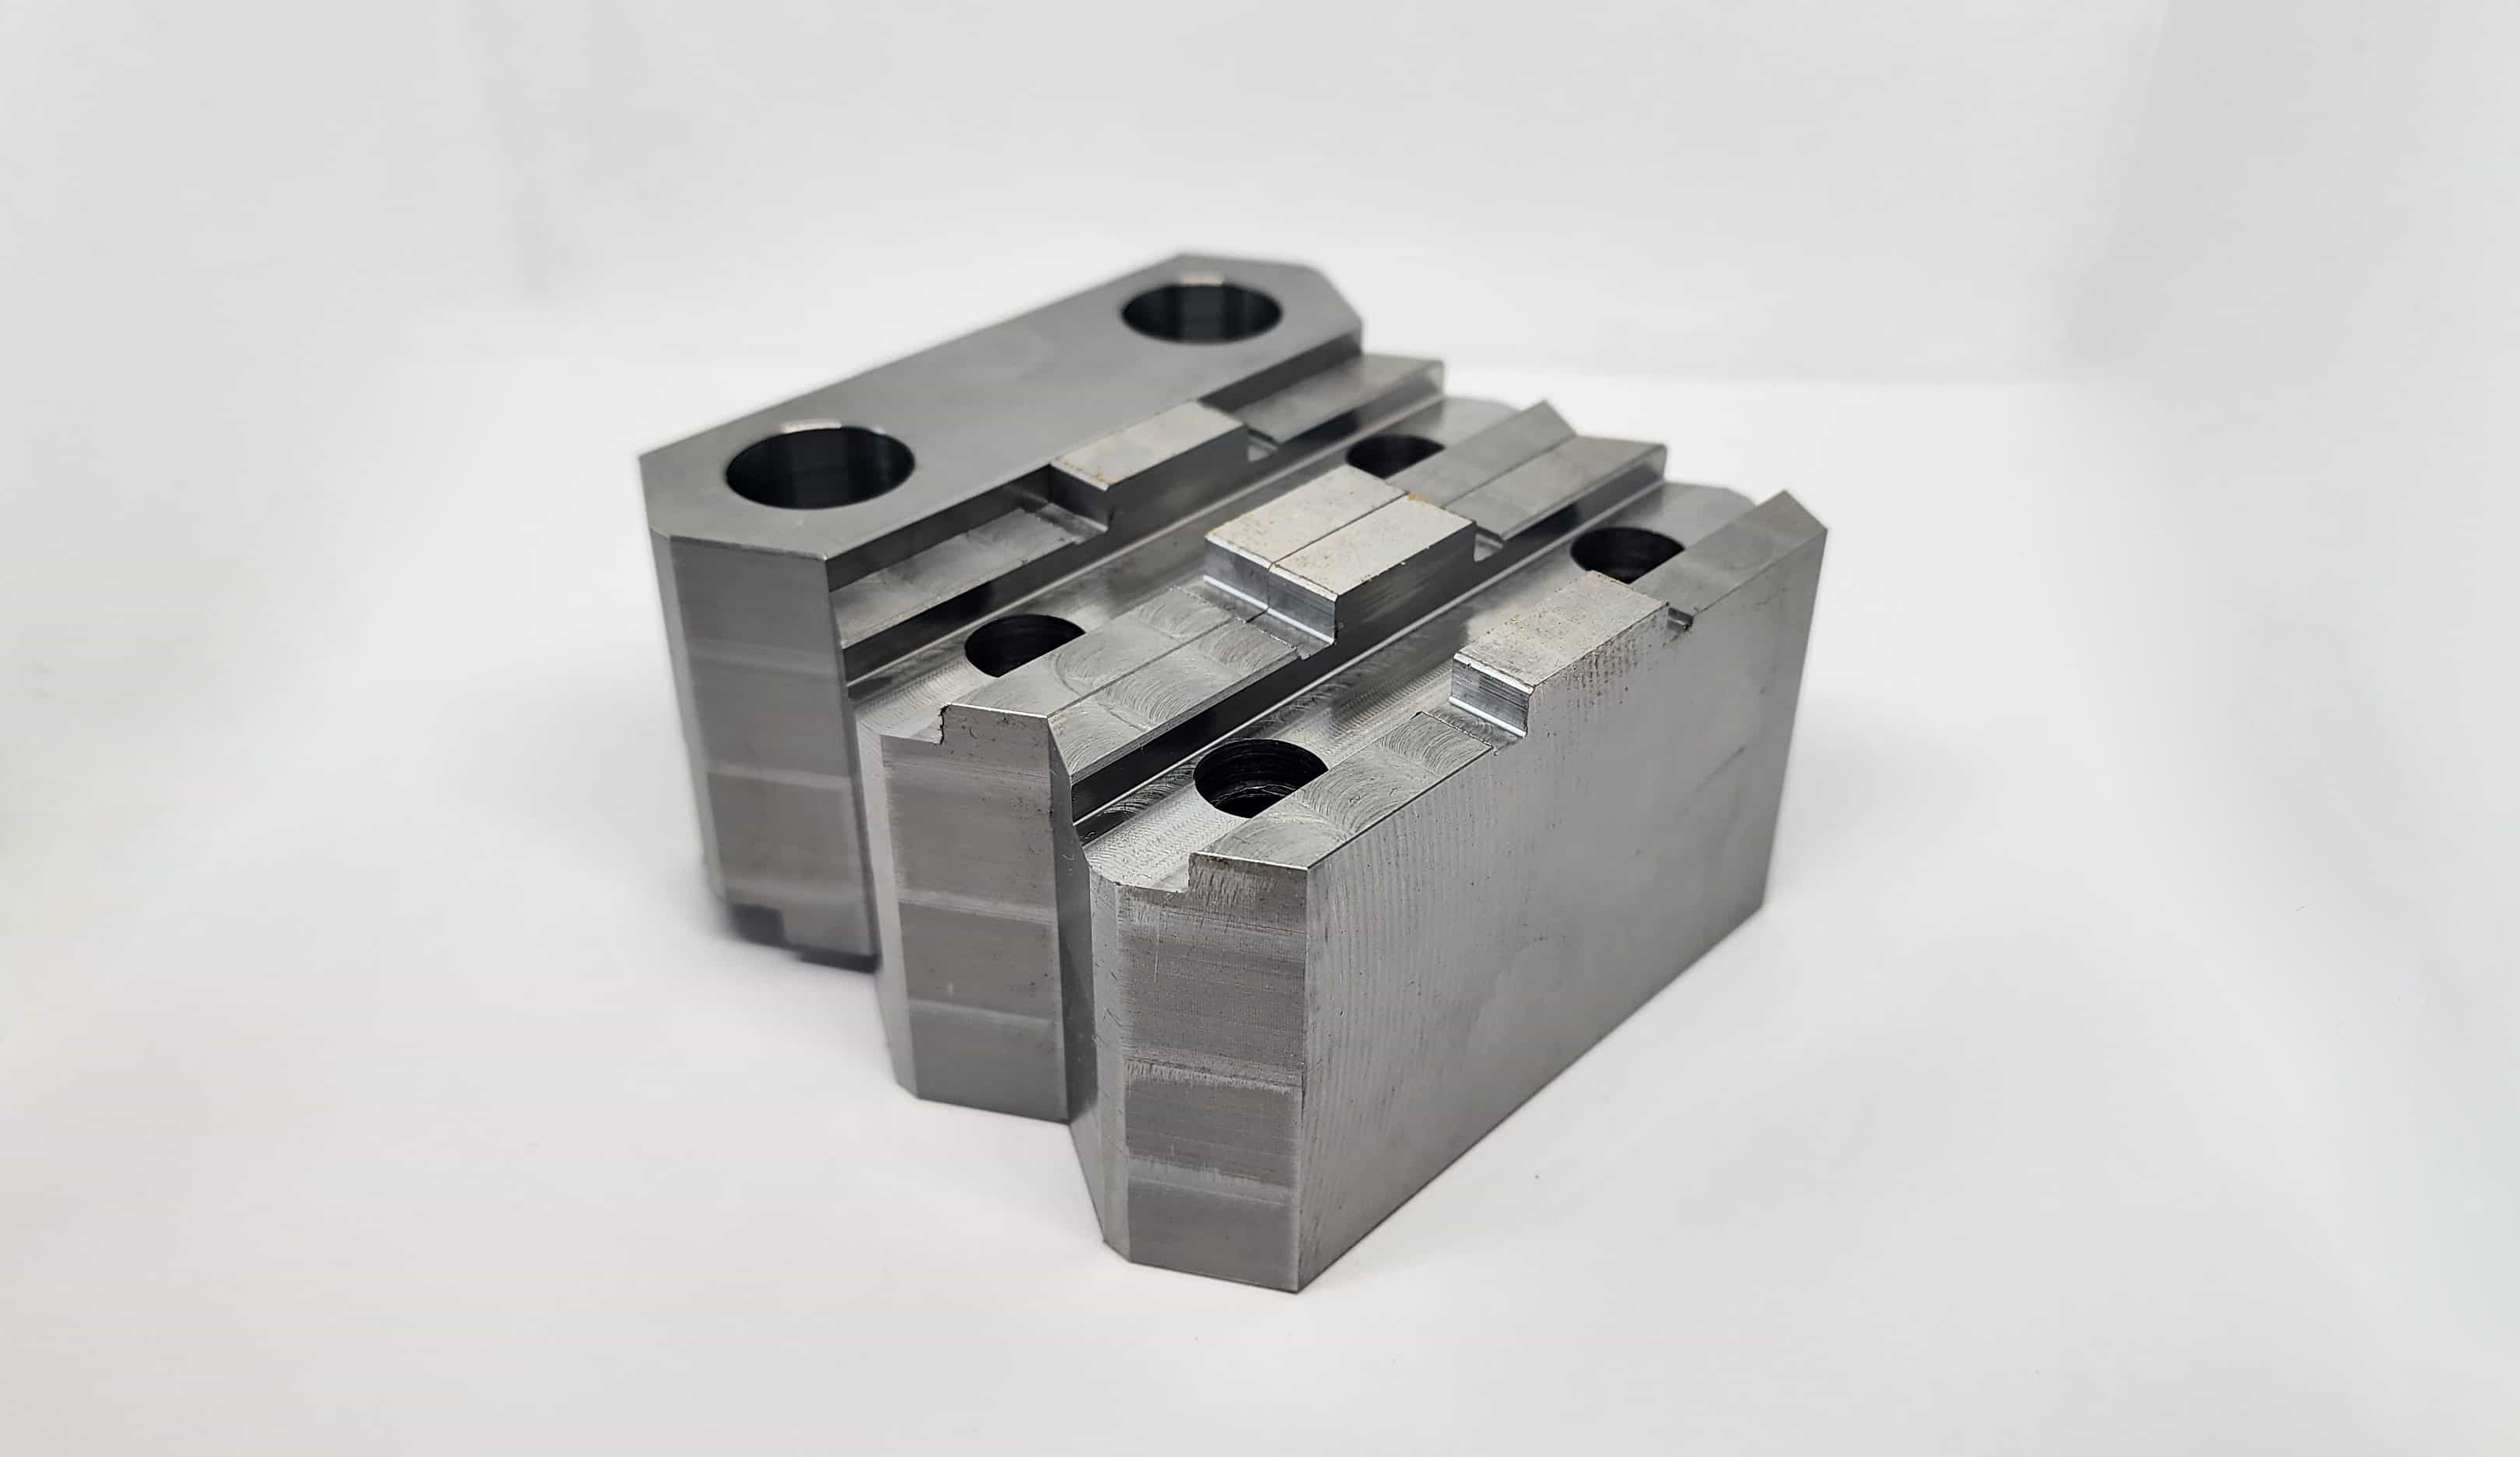
Lathe chuck jaws work in a harsh environment: high clamping forces, repeated loading, vibration, chips, and sometimes abrasive dust. That is why jaw life is not defined by machining alone — it is defined by the combination of material + heat treatment + finishing.
When this combination is selected correctly, you get:
- stable grip without slipping on heavy cuts;
- predictable runout and repeatability across setups;
- longer jaw and chuck life (less “over-tightening” by operators);
- fewer surface marks and fewer rejected parts.
When it is selected incorrectly, you typically see fast wear, chipping, cracks, or distortion (which immediately turns into runout problems). This article explains how to reach wear resistance without the two classic risks of hardening: cracking and warping.
Promservice manufactures chuck jaws and other tooling for metal-cutting machines. We select steel and heat-treatment routes according to your part, your cutting conditions, and your repeatability requirements.
How chuck jaws fail in real production
Before choosing a steel grade or a hardening method, it helps to name the failure mode you are trying to avoid.
Common jaw issues include:
- surface wear on the gripping faces (loss of grip, increased slip);
- rounded serrations / teeth (especially on hard materials and short grips);
- micro-chipping at the edges (often from interrupted cuts or impact loads);
- cracks after hardening (usually from high residual stress + aggressive quench);
- distortion / loss of geometry (jaw no longer seats correctly, runout grows);
- “polished” contact zones that reduce friction and promote slipping.
Different problems require different solutions. For example, maximum surface hardness is not always the best answer if the jaw also sees impacts — then core toughness becomes critical.
What properties matter: not only hardness
Wear resistance is a combination of several factors:
- Surface hardness (resists abrasive wear and indentation).
- Core toughness (prevents brittle fracture, especially under impact).
- Case depth / hardened layer thickness (for surface-hardened solutions).
- Residual stress level (too high → cracks or distortion).
- Surface finish and contact area (edge contact increases local stress and wear).
A good jaw is usually a balanced system: a hard working surface with a tougher “body,” plus a finishing route that keeps geometry under control.
Material selection: typical steel groups for chuck jaws
In practice, chuck jaws are made from several families of steels. The “best” one depends on your load, wear mechanism, and production volume.
1) Alloy steels for quench-and-temper (through-hardened jaws)
These are commonly used when you need a strong, durable jaw with good overall strength and reasonable cost. They are suitable for many general machining tasks.
Typical use cases:
- mixed production and general turning;
- medium-to-heavy clamping loads;
- jaws that will be re-ground or reworked during their lifecycle.
2) Case-hardening steels (carburized/case-hardened jaws)
These steels are designed to get a very hard surface with a tougher core. They are often chosen for high wear where the jaw must keep its tooth/serration geometry for a long time.
Typical use cases:
- serial work with repetitive clamping;
- abrasive conditions (chips, scale, certain materials);
- high requirements for “tooth life” on gripping faces.
3) Tool steels and wear-oriented grades
Some projects benefit from steels that keep hardness and wear resistance well, especially when clamping surfaces see abrasive interaction. Selection depends strongly on jaw geometry and required toughness.
Typical use cases:
- highly abrasive environments;
- frequent heavy clamping with minimal surface “rounding.”
Important note: selecting a steel grade is not “one-size-fits-all.” A jaw that must survive impacts needs a different balance than a jaw that must resist steady abrasion.
Heat treatment routes: what you gain and what you risk
Below are the most common hardening strategies used for chuck jaws. Each one has a different balance between wear resistance, toughness, and distortion risk.
Quench and temper (through hardening)
What it gives: hardness through most of the cross-section, strong overall jaw body, good load capacity.
When it fits: general-purpose jaws and many custom jaws where the geometry allows controlled distortion and finish grinding is planned.
Main risks: cracking (if quenching is too aggressive), distortion (especially on asymmetrical jaws), and “too brittle” condition if tempered incorrectly.
In production, through hardening is often paired with finish grinding of key seating and working surfaces to restore accuracy.
Case hardening (carburizing + hardening)
What it gives: a very hard wear-resistant surface layer with a tougher core.
When it fits: long-run production where the gripping surface is the main wear zone.
Main risks: distortion is more likely than with some other methods, and the process requires correct machining allowances and finishing.
Case-hardened jaws are usually designed with a finishing plan (grinding or controlled finishing) so that geometry is accurate after treatment.
Nitriding / nitrocarburizing (surface hardening with low distortion)
What it gives: a hard surface layer with good wear resistance and typically low distortion, because it is done at lower temperatures and without classic quenching.
When it fits: jaws where geometry stability is critical and the load is not dominated by heavy impact.
Main risks: the hardened layer is relatively thin compared to carburizing; if the jaw sees strong impacts, the surface layer can chip if the core is not appropriate.
This route is often attractive when you need wear resistance and want to minimize post-treatment geometry corrections.
Induction hardening (local hardening)
What it gives: hardening only where needed (for example, on gripping faces), leaving the rest tougher; can reduce distortion compared to full hardening if controlled well.
When it fits: larger jaws, special jaw designs, or when you want a hard wear zone but maintain a tougher body.
Main risks: process control is critical; uneven heating can lead to distortion or local cracks.
Induction hardening is most effective when the “wear zone” is clearly defined and the jaw design supports uniform treatment.
How to prevent cracks: practical design and process logic
Cracks after heat treatment are rarely “bad luck.” Most of the time they come from a predictable combination of geometry + stress + cooling rate.
Typical prevention measures:
- avoid sharp inside corners and notches (add radii where possible);
- keep transitions between sections smooth to reduce stress concentration;
- plan the sequence: rough machining → stress relief (if needed) → heat treatment → finish machining/grinding;
- avoid “over-hardening” — unnecessary maximum hardness can reduce toughness;
- use controlled heating and cooling (quenching) with proper parameters for the selected steel;
- temper promptly after quenching (standard best practice in industrial hardening).
Heat treatment should be done by qualified specialists with the correct equipment and process control. For precision tooling like jaws, process discipline matters more than “the hardest number on paper.”
How to minimize distortion: keep geometry predictable
Distortion is the second big risk: the jaw comes back harder but no longer accurate. For chuck jaws, even small geometry changes can increase runout.
A distortion-minimizing approach usually includes:
- machining allowances for post-treatment finishing (especially on seating surfaces);
- finish grinding where repeatability and runout are critical;
- symmetrical jaw design where possible (or fixtures that compensate for asymmetry);
- stress-relief steps after heavy rough machining (when appropriate);
- choosing a treatment route with lower distortion when accuracy is the main priority (often surface treatments like nitriding, depending on requirements).
The key idea is to treat heat treatment as part of the manufacturing route, not as a “separate final operation.”
Quick selection guide: matching the route to the job
There is no single best option, but the selection becomes easier when you start from the application:
- Heavy roughing, high torque, risk of impact: prioritize core toughness + stable grip; through hardening or controlled surface hardening with a tough body.
- Long series, abrasive conditions, jaws wear fast: prioritize a hard wear surface; case hardening or suitable surface hardening routes with planned finishing.
- High repeatability, low runout requirements: prioritize geometry stability; choose a route that supports low distortion and include grinding in the plan.
- Delicate parts / minimize marks: jaw geometry and contact area often matter more than “maximum hardness” — consider profile solutions and finishing quality.
Quality control: what should be checked
A professional jaw manufacturing route typically includes checks such as:
- hardness control (surface and/or core, depending on route);
- geometry of seating and working surfaces after treatment;
- visual inspection for cracks and local defects;
- contact pattern and grip behavior under real clamping conditions.
For many customers, the most important “result metric” is simple: stable, repeatable clamping without slipping and without unexpected runout growth.
Promservice approach: wear resistance with controlled geometry
When we manufacture chuck jaws, we treat material choice, heat treatment, and finishing as one system. Depending on your requirements we can:
- select the steel and treatment route for your load and wear conditions;
- plan machining allowances and post-treatment finishing;
- provide grinding/finishing of critical surfaces for repeatability;
- manufacture jaws to drawing or to sample for replacement or modernization.
Need wear-resistant chuck jaws for your chuck?
Send us your chuck model, jaw interface photos (or drawings), and information about your part/material and cutting conditions. Promservice will propose a practical solution — a jaw material and heat-treatment strategy that delivers wear resistance without cracks and without geometry surprises.