If the same part shows different runout every time you clamp it, or if a “good” setup suddenly stops repeating, the first instinct is often to suspect the spindle or the machine. In reality, the most common sources are closer to the part: jaws, chuck condition, jaw seating surfaces, and everyday clamping habits.
This article explains:
- what “runout” and “repeatability” really mean in production terms;
- typical jaw- and chuck-related reasons why accuracy degrades;
- how jaw grinding / lapping improves repeatability (and what it cannot fix);
- a practical checklist to isolate the root cause quickly.
Promservice manufactures chuck jaws and other workholding tooling for metal-cutting machines, including jaws made to drawing or to sample. We also support customers with practical recommendations for improving repeatability on real machines.
Runout vs repeatability: two different problems
These terms are often mixed, but they describe different things.
- Runout is the deviation you measure right now (for example with a dial indicator on the OD/ID of the part).
- Repeatability is how consistently the chuck places the part after re-clamping (remove → clamp again → measure). A chuck can show “acceptable runout once” but still have poor repeatability.
In production, repeatability is often the more expensive problem. If the part does not repeat, you lose time on indicating, offsets, and corrective passes — even if the measured runout is not catastrophic.
Why runout grows over time: the most common root causes
A useful way to troubleshoot is to group causes into four categories:
- Jaw-related: wear, damage, incorrect seating, geometry errors.
- Chuck-related: worn scroll (spiral), worn jaw guides, body damage, mounting issues.
- Workpiece-related: out-of-round stock, burrs, scale, poor reference surfaces.
- Process/handling-related: inconsistent clamping torque/pressure, excessive stick-out, chips between contact surfaces, wrong jaw selection.
Below are the typical issues you see in each category.
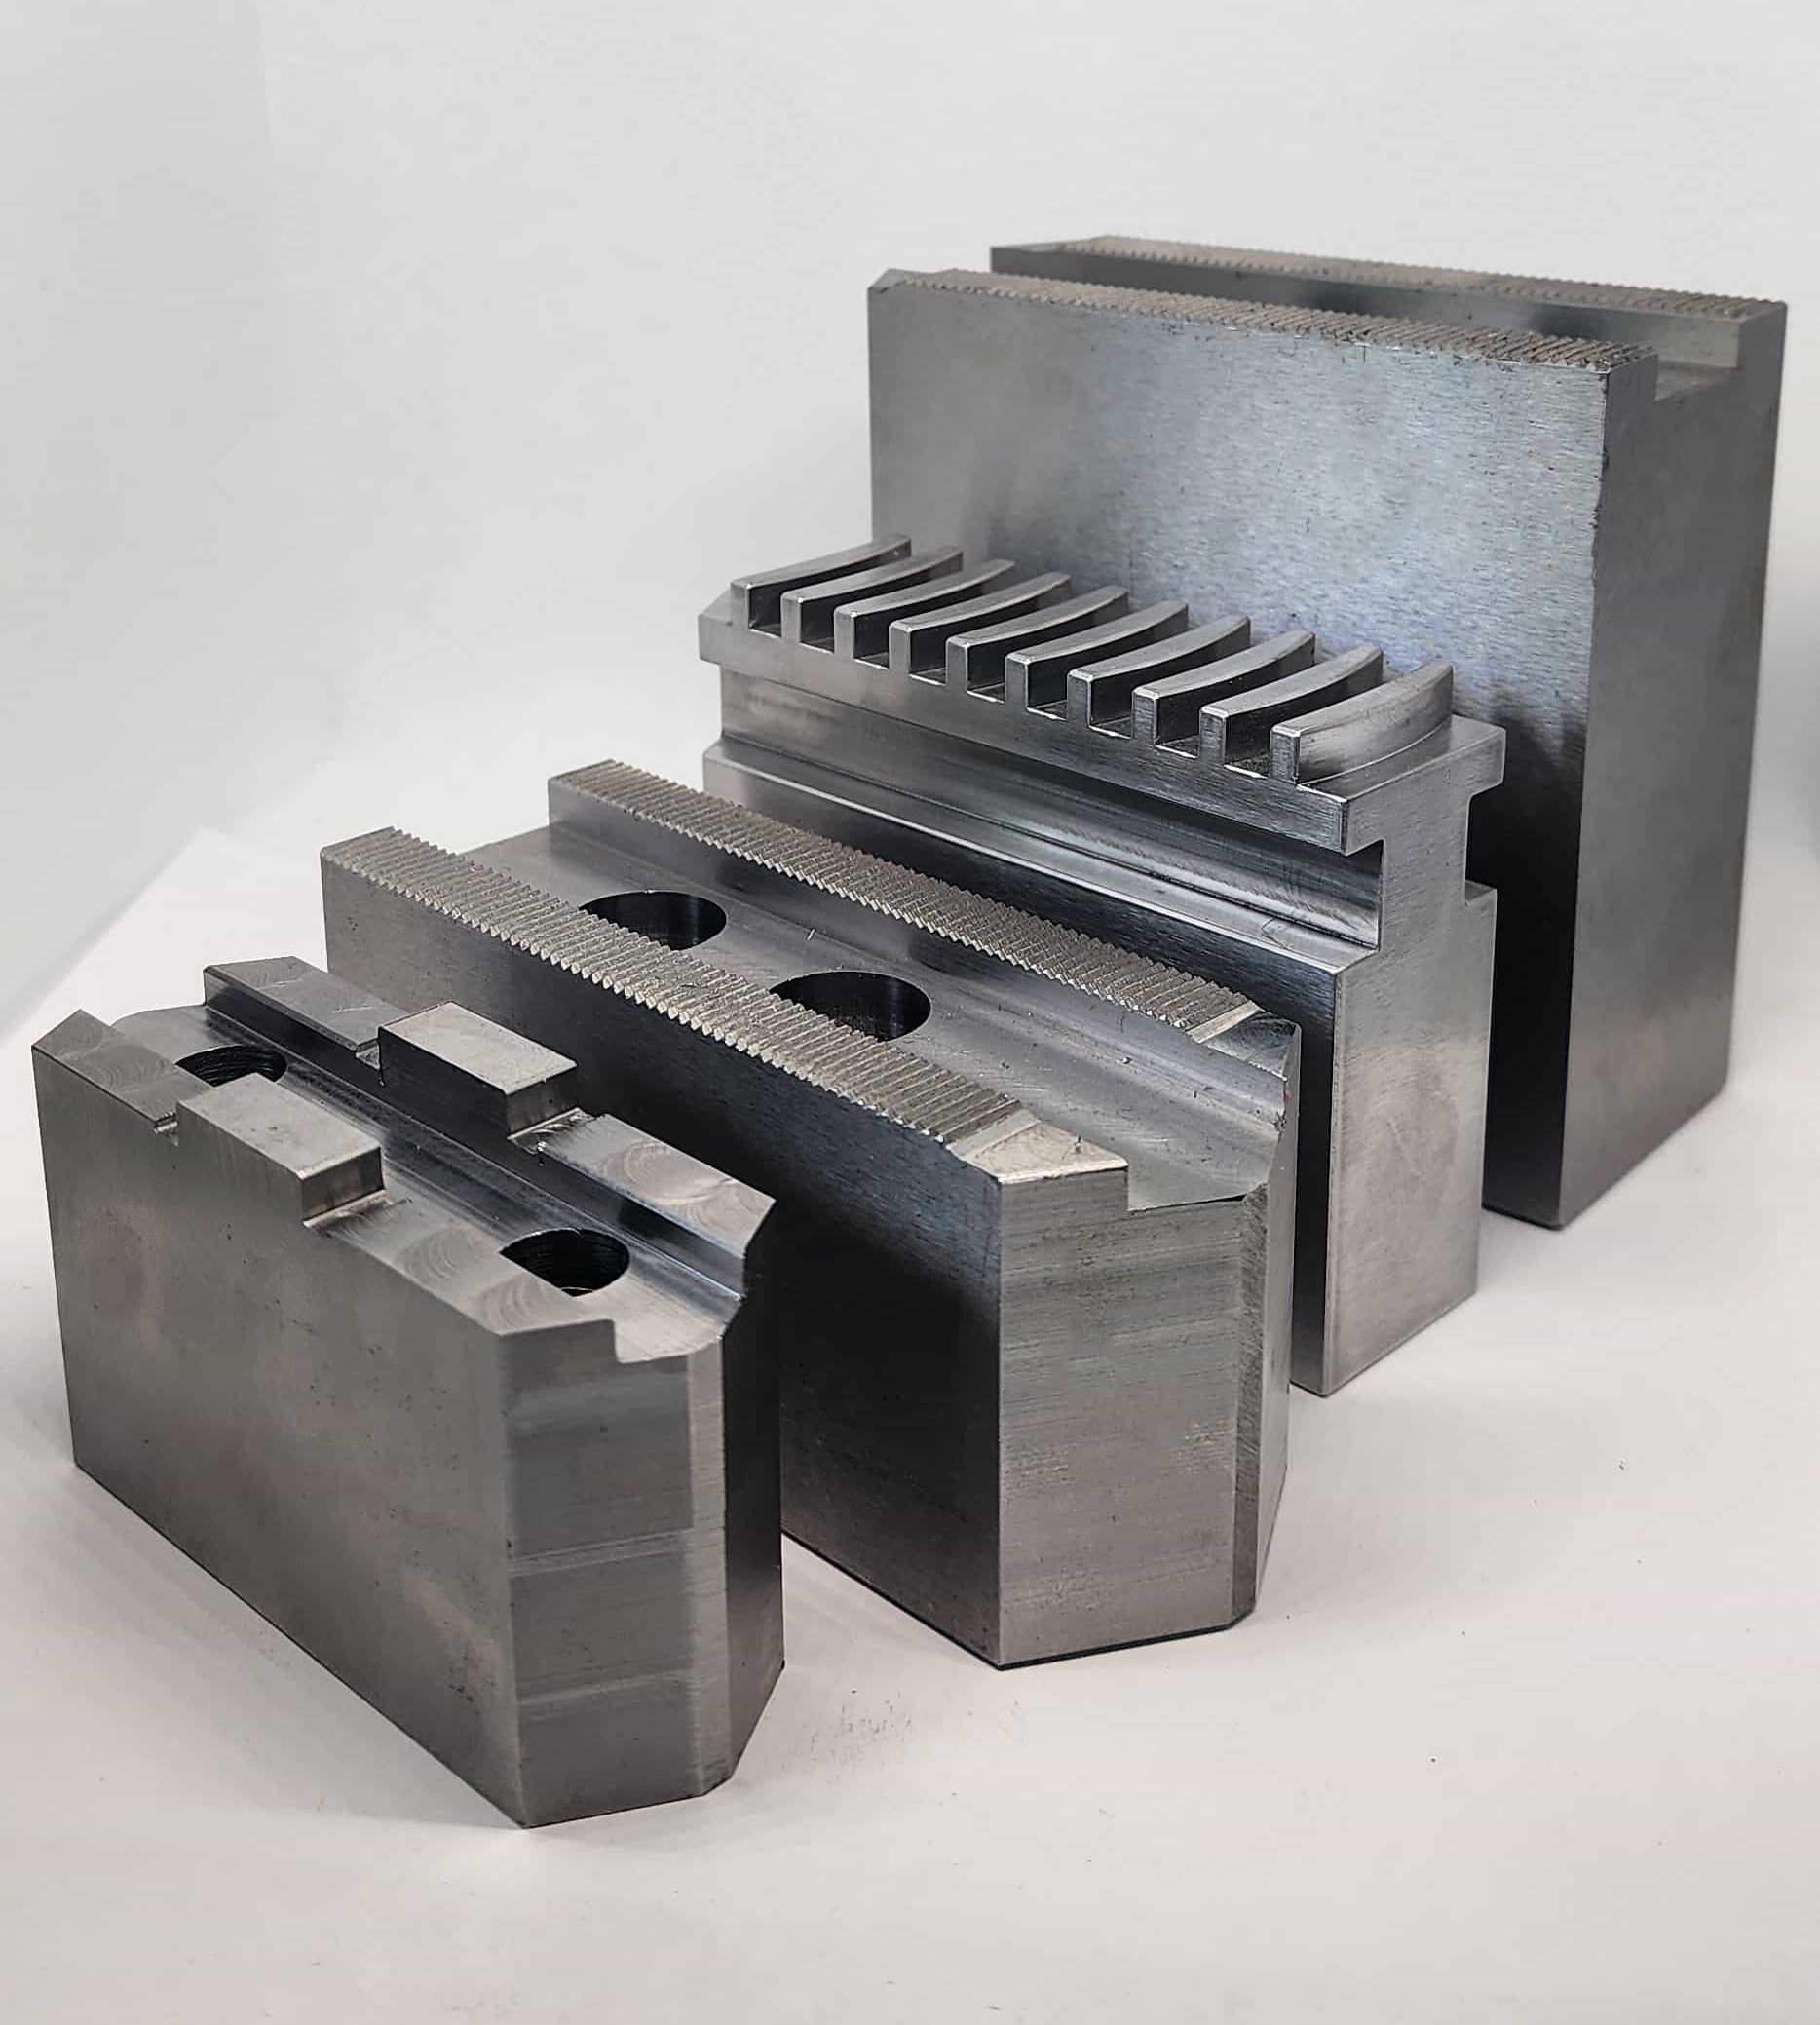
Jaw-related causes (the “top suspects”)
1) Worn gripping faces (rounded serrations, polished contact)
As jaws wear, the contact pattern becomes smaller and more “slippery”:
- serrations round off;
- the surface gets polished;
- the jaw starts to contact the part on a narrow band.
Result: the part can shift under cutting load or under clamping force itself, and repeatability becomes unstable.
2) Jaw seating problems (chips, burrs, dents on the interface)
Even a tiny chip on the jaw interface can tilt the jaw. This creates a predictable pattern: you can clamp the part “straight,” but the next setup will be different depending on where the chip sits.
Common reasons:
- chips on the jaw tongue/slot surfaces;
- burrs after jaw removal;
- dents from improper handling and storage.
3) Jaws installed in the wrong order / mixed sets
On many scroll chucks, jaws must be installed in a numbered sequence (1–2–3). Mixing the order or mixing jaws from different sets can dramatically reduce repeatability.
Even if the part looks “close enough” once, it will not repeat reliably.
4) Bell-mouthed jaws (contact only at the outer edge)
With heavy use, jaws can develop a shape where they grip mostly at the front edge. This is especially common when clamping short parts near the jaw tips.
Symptoms:
- unstable runout after re-clamping;
- marks on the part near the jaw edge;
- “good” runout only at one specific clamping position.
Jaw grinding can help here — but only if the chuck and seating are in reasonable condition (see below).
Chuck-related causes (what jaw grinding will NOT fix)
1) Worn scroll and jaw guides
If the scroll and jaw guideways are worn, jaws can “rock” under load or sit differently depending on the clamping direction and force.
Typical sign: runout changes when you clamp with slightly different force, or when you clamp at different diameters.
2) Mounting errors between chuck and spindle/backplate
Dirt, burrs, or damage on the mounting faces can introduce runout that looks like a jaw problem.
Quick signs:
- runout is similar even with a test bar in a collet (if available);
- runout changes after removing and reinstalling the chuck;
- the chuck body itself shows runout on its reference diameter/face.
3) Bent parts in the system (spindle nose, adapter, backplate)
Less common than jaw issues, but possible. Before you suspect the spindle, eliminate the “easy” causes first.
Workpiece and process causes (often underestimated)
- Out-of-round stock: if the raw bar/sleeve is not round, jaws will force it into a different position each time.
- Burrs and scale: a small burr on the clamping surface can tilt the part.
- Inconsistent clamping force: different operators or different hydraulic/pneumatic pressure settings change jaw deformation and contact.
- Too much stick-out: the longer the overhang, the more any small misalignment becomes visible at the indicator.
- Wrong jaw type for the job: hard serrated jaws can mark or deform thin-walled parts; internal vs external clamping choice matters.
A practical diagnostic checklist (fast and effective)
Use this sequence to isolate the cause without guessing.
Step 1 — Clean the basics
- Clean the jaws, serrations, jaw slots/tongues, and the chuck face.
- Remove chips and inspect for dents/burrs.
- Check lubrication points (a dry scroll chuck is a common source of inconsistency).
Step 2 — Verify jaw order and set integrity
- Make sure jaws are installed in the correct numbered order.
- Do not mix jaws from different sets (unless they were matched/ground together intentionally).
Step 3 — Measure the “system runout,” not only the part
- Indicate the chuck body reference surfaces (if accessible).
- If you have a test bar, clamp it and measure at different distances from the chuck. A growing value with distance often points to angular seating issues or excessive stick-out.
Step 4 — Repeatability test (the most revealing test)
- Clamp, measure, unclamp, rotate the part, clamp again, measure again.
- If the measurement changes unpredictably, you likely have a seating/cleanliness/wear issue — not a single “static” runout error.
Step 5 — Check the clamping diameter and force
Many chucks repeat best at certain diameter ranges and with consistent force. If you always clamp a part at the jaw tips with high force, you are asking for bell-mouth and instability.
What jaw grinding actually does
Jaw grinding is not “making the jaws shiny.” Its purpose is to create a concentric gripping surface under real clamping load, so that the part seats in a repeatable way.
There are two key ideas:
- grinding is often done in-situ (with jaws installed in the chuck);
- jaws must be preloaded during grinding so they sit in the same stressed condition as during real clamping.
In-situ jaw grinding (typical method for improving concentricity)
The jaws are loaded using a ring or a dedicated fixture:
- For external clamping jaws, the jaws are usually preloaded outward (as if gripping a part).
- For internal clamping, the preload direction is reversed.
Then the gripping faces are ground to be concentric with the chuck axis in that loaded state.
Why this improves repeatability: It compensates for small positional differences caused by scroll wear and jaw guide clearance — but only at the clamping condition used for grinding.
Lapping / fine finishing (when it is used)
Lapping is a controlled fine finishing method used to improve contact pattern and surface quality. It is not a universal replacement for grinding and must be used carefully, especially on hardened jaws and precision seating surfaces.
In practice, lapping may be used for:
- improving contact pattern after grinding;
- light corrections on specific surfaces where appropriate.
Limitations: what you must know before grinding jaws
Jaw grinding is effective, but it is not magic. It has limits:
- It is condition-specific. If you grind jaws at one diameter and clamping force, the best result is around that range. If you clamp far outside that range, repeatability may degrade again.
- It cannot fix a badly worn chuck. If scroll and jaw guides are heavily worn, grinding will not restore stable repeatability for all diameters.
- It removes material. Over-grinding reduces jaw life and can reduce grip safety.
- It requires proper safety and experience. In-situ grinding should be performed by trained personnel using correct equipment and safety procedures.
For high-volume work, many shops plan jaw grinding as part of maintenance — but only after ensuring the chuck itself is still a good candidate.
When jaw grinding is the right solution
Jaw grinding is usually worth it when:
- the chuck is generally healthy, but repeatability has degraded over time;
- jaws show bell-mouth, uneven contact, or rounded serrations;
- you run series parts at the same clamping diameter range and need stable repeatability;
- you are using soft jaws or custom jaws that must “repeat” reliably for a specific part.
If you clamp many different diameters and need high precision across a wide range, consider part-specific jaws/top jaws or a different workholding strategy.
How to maintain repeatability after you fix it
Once you improve the chuck behavior, simple habits keep it stable longer:
- clean jaw interfaces and the chuck face daily (chips are the repeatability killer);
- lubricate the scroll and guides as recommended;
- keep jaw sets together and store them protected from dents and burrs;
- avoid excessive force on thin-walled parts — use proper profiles or soft jaws;
- minimize stick-out and use tailstock/support when needed;
- if repeatability is critical, standardize clamping force (operator torque or hydraulic pressure).
Need help reducing runout and improving repeatability?
Promservice can manufacture chuck jaws (straight, reverse, combination, custom profiles) to drawing or to sample. If your problem is runout and repeatability, it helps to provide:
- chuck model and jaw interface photos/drawings;
- part drawing (or a sample), clamping diameter range, and material;
- required runout / repeatability target;
- cutting conditions and batch size.
With the right jaw geometry and a controlled finishing route (including grinding where appropriate), you can often restore stable clamping, reduce rework, and extend chuck life.